Rammed earth buildings can either be built by erecting forms- or by ramming earth in blocks (like large bricks) and laying these in courses.
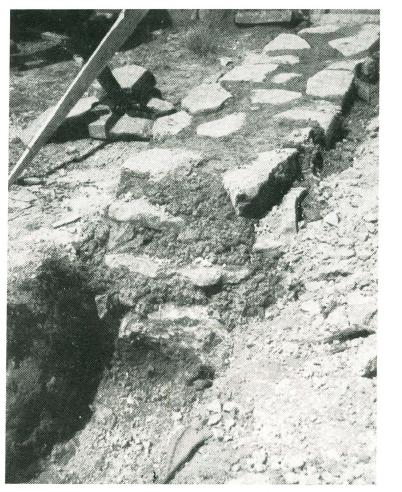
Foundations and footings are made by setting large stones in clay in the foundation trench. Clay is in many ways better than concrete for rammed earth buildings, because it is impervious to moisture.
If concrete foundations are used, then it is necessary to put in a dampcourse, but with clay and stone no dampcourse is needed.
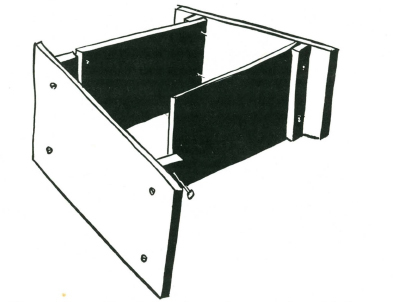
—Photo by John Culliton
FOUNDATIONS
The foundations (footings), as shown here, are large stones set in clay. The foundations extend from six to nine inches above ground level. Foundation trench is 2 ft. wide by 1 ft. deep, and lined with at least one inch of clay. After laying the stones in the clay, they are rammed to make a firm bed.
The advantage of this method of laying foundations is that there is no cost, and the method is speedy.
One man can dig and lay fifteen to twenty feet of foundation in a day.
The foundation must extend above ground level so that in the event of very heavy rain the surface run-off will not reach to the rammed earth wall.
SOIL QUALITIES FOR RAMMED EARTH
Any “heavy” loamy soil is suitable for rammed earth building. The soil must be just right for its moisture content. To find out the right “consistency”, roll up a ball of the earth (about the size of a golfball) between the palms and drop it from a height of about one foot. If the ball breaks up, the soil is too dry, and moisture must be added before ramming.
If the ball does not break from a foot high drop, then hold the ball above the head and drop it again. If the ball does not shatter into small fragments with a six or seven foot drop, then the soil is too moist and must be allowed to dry out before ramming.
The qualities in the soil are easily determined. There should be not more than 70 per cent sand, and not less than 30 per cent. There should be not more than 70 per cent clay and silt, and not less than 30 per cent.
If Sand or Grit is between three-tenths and seven-tenths soil will be O.K.
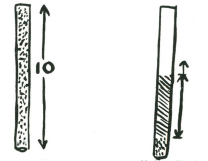
To discover if the soil is all right for rammed earth work, take a glass tube ten inches long, or, alternatively, divide a glass tube into ten equal divisions. Dry some of the earth, crumble it to fine powder, and fill the tube. Take the exact quantity which was in the tube and put it into a billy or dish, and wash thoroughly in running water until all the clay and silt particles have been washed out. Dry the remainder and then put back into the tube. The level will tell you the approximate percentage of clayey content that was in the soil.
If the soil has too much clay it will crack; if too little clay or too much sand or organic matter it will crumble.
—Photo by John Culliton.
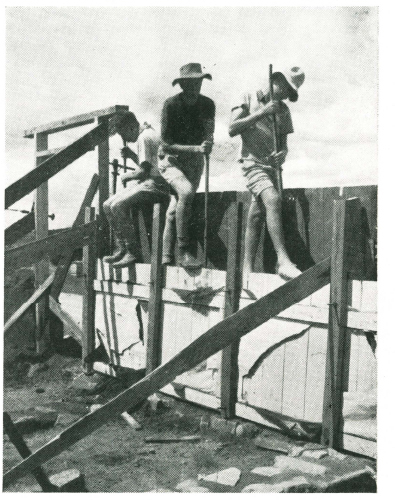
This photo shows a rammed earth Hostel in course of erection. This hostel is to provide snow accommodation for 20 people. It is 35ft. by 22ft., 8ft. walls, 1ft. thick. The total cost of the building is estimated to be under $300. The only materials bought are iron for the roof, timber for roof, and floor, doors, windows, and 5 bags of cement for facing of the rammed earth wall and also for a 3-inch top sill for same.
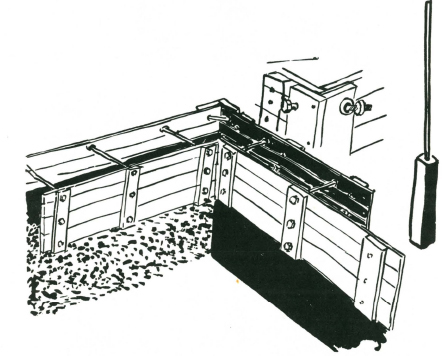
FORMS
Forms can be made and bolted together, and in these the earth can be rammed or, alternatively, moulds can be made and the earth rammed into these to form blocks, and these blocks are then laid in courses like large bricks.
If forms are used they need not be more than two or three feet high and six to eight feet long. The forms are held by bolts which, when tightened up, clamp the form to the wall.
When ramming, shovel in three or four inches of earth and ram until the earth “rings”. This is quite a definite sound, unmistakable from the soft “thud thud” of the first ramming strokes.
Ramming is hard work, and tiring.
When the layer is “ringing”, throughout its length, shovel in another three or four inches of soil, and repeat.
Rammers should be from 6 to 8 lb. A hardwood base, about 4 in. x 4 in. x 10 in. long, handle maybe a 5 ft. length of gaspipe.
If moulds are used they must be of a design which can be quickly “knocked down” to remove the rammed earth block, and as quickly re-assembled.
One man can fill and ram about nine to twelve cubic feet in a day.
Rammed earth walls should be at least nine to ten inches in thickness for an eight-foot wall, or twelve to fifteen inches if a top structure or greater height are required.
Rammed earth walls may be protected from driving rain either by providing a wide overhang to the eave, by plastering with a cement or lime mortar, or by giving a cement “skin” by brushing on a thick cement-sand mixture (one-to-two proportion). However, even without the cement skin, rammed earth will stand up to a hundred years or more of weather.
LOG CABINS
Where timber is plentiful and white ants (termites) not prevalent and a structure of permanence is required, the Log Cabin is suitable. It is permanent, solid, and easy to build. The construction is simple. Cut your logs (which should be of roughly uniform diameter) to within a few inches of the required lengths. Lay the bed logs, which should be the heaviest logs. See that these are laid square. Where the end logs lie across the back and front logs, halve or scarf the sites for the logs.
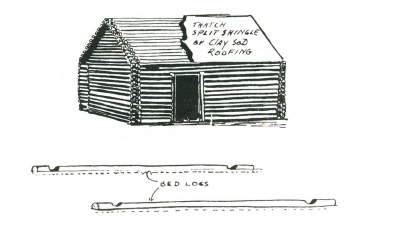
The remainder of the construction follows exactly the same method. The logs are carved into each other.
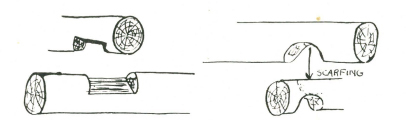
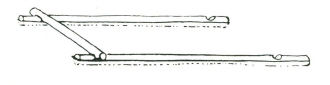
These are two methods of scarfing logs for building. The flat surface of the bottom log always “falls” outwards, so that when any rainwater blows in it will not find a place for easy lodgement, but will drain away because of the natural slope of the bottom of the scarf. Chinks between the logs should be filled with clay.
MATERIALS FOR LASHINGS
In bushcraft work it is assumed that no manufactured materials are available, and therefore in hut making lashing must be used when no nails are available. Rope, too, may be unprocurable, and it is then necessary to know what natural materials can be used and how.
For lashing, sewing, and tying, any ground or tree vine which has length, strength and pliability will serve. Length, of course, is visible and easily found, but tests for strength and pliability should be applied. The test for strength is simply to exert a steady straight pull on the material. You will be able to judge its breaking strain if under sixty or eighty pounds. The test for pliability is to tie a thumb knot in the vine and gently pull the knot tight. If the vine snaps or cuts upon itself, it lacks pliability and must be discarded.

In addition to ground and tree vines, the outer skin of the long leaves of most palms may be used for ties. To harvest these, nick the hard outer shell with a cut about one-quarter inch wide and an eighth of an inch deep. Start the outer cane splitting, and to prevent it “running off” bend the thick portion away from the thin.
This is most important. If you pull the thin strip and bend it away from the main stalk, it will split for a few feet and then “run off.” This principle of bending AWAY from the tendency to run off applies to all canes, palms, vines, bamboos and barks.