Figure 10
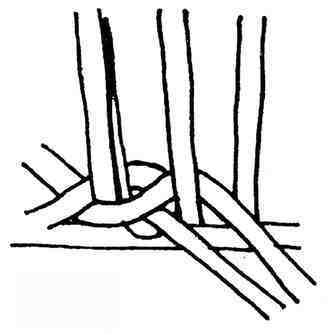
Figure 11
Adding Spokes
In order to make your basket expand you must add spokes. On the next row you will add a spoke to each of the four corners of the start. This will even things out and make it look more like the spokes of a wheel than a cross (fig. 12).
Select four new spokes and bevel each butt end with a long sloping cut which is two or three times the diameter of the spoke in length.
Add the first spoke between Spokes C and D. Using an awl, gently open a space in the weaving alongside Spoke C. Remove the awl, and slide the new spoke deep into the start with the bevel facing Spoke C (fig. 13).
Continue twining. Twine around the new spoke, as though it had always been there. Add a spoke to each corner in the same way (fig. 14). On the next round, add a new spoke next to every other spoke. This will give your basket a good flat foundation.
Point X marks the beginning of each row. Try to keep track of it as it is the point where you begin anything new. If you like, twist a piece of colored thread around the spoke next to Point X to mark it clearly. When you change the rate at which you add spokes, do it at the beginning of the row and keep it up until the end. Doing this will keep your basket more uniform.
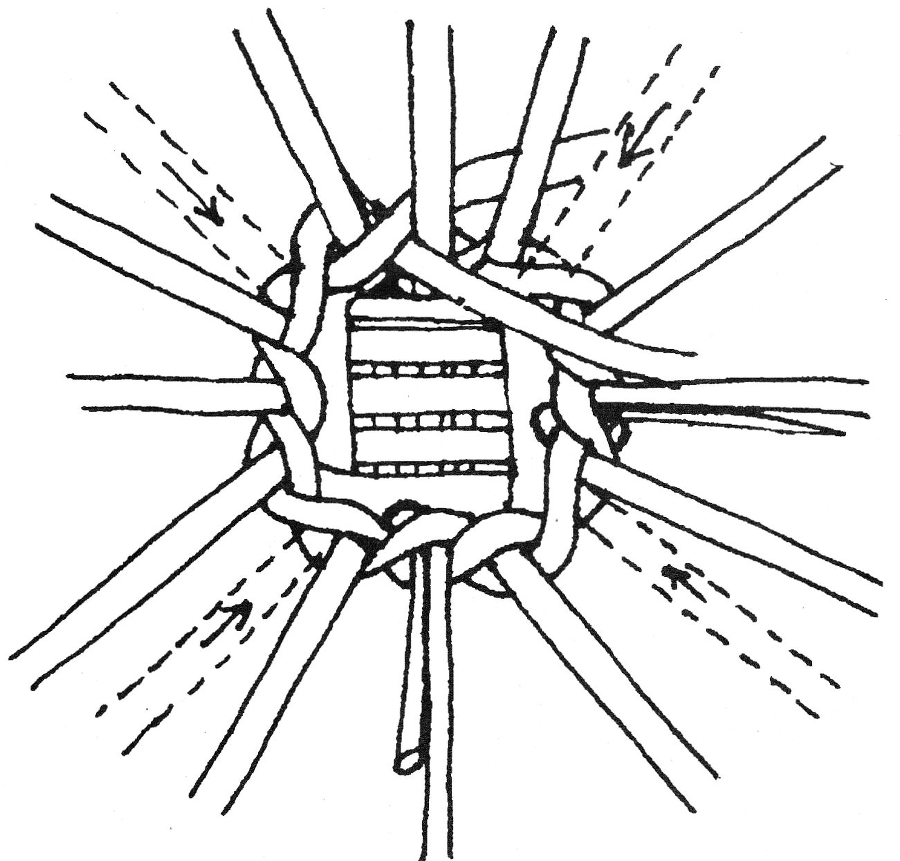
Figure 12
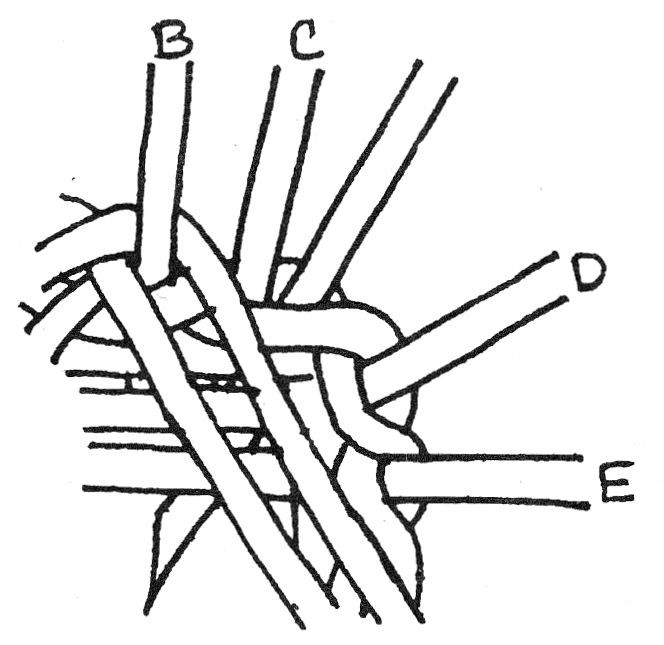
Figure 13
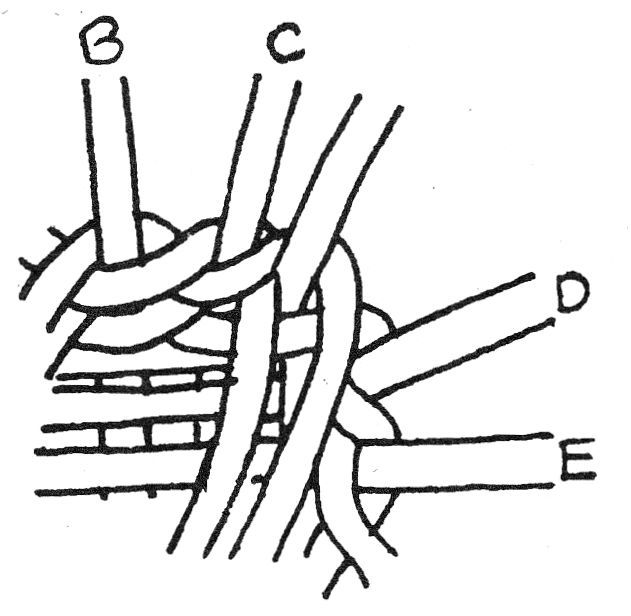
Figure 14
Shaping the Basket
The shape and size of your basket should be determined by the number and placement of the spokes. To make a flat tray, you need to add a lot of spokes consistently throughout the basket. If you add too many, however, the basket will become wavy like a warped record.
To make a cone-shaped basket, add fewer spokes but just as regularly. To make a bowl-shaped basket, add spokes for a while to form the base and then stop altogether, allowing the sides to turn up.
You can also shape your basket somewhat by bending the spokes into place. For a bowl-shaped basket, manipulate the spokes away from you as you progress. This way you will always be working from the outside of the basket and all of the splice ends will be on the inside. On a flat tray, however, the splice ends should stick out on the underside.
After you have twined three or four rows, you can decide whether you want to open or close twine. To close twine, continue just as you have, pulling each row down as close as possible to the previous row. Stop between rounds and pack each row of twining down with the side of your awl. To open twine, start sloping up at the beginning of a row. When you reach the distance you want to be from the previous row, continue parallel to it. It is even more important to use small twiners and keep everything tight when open twining.
Finishing
When you have achieved the size and shape of basket you want, you must do some kind of finish. The finish keeps the basket from unraveling and hides all the spokes protruding at the top. If you have been open twining, close twine a few rows to form a rim before you do the finish. Certain finishes also reinforce the rim, which is sometimes necessary.
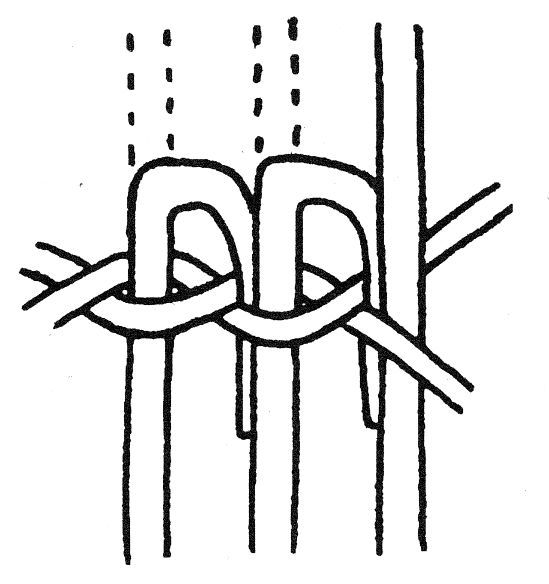
Figure 15
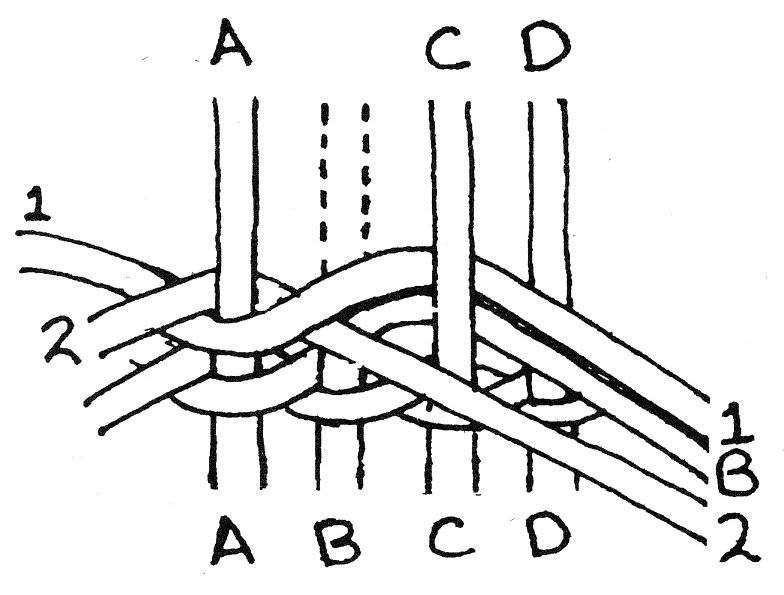
Figure 16
Before you begin the finish, you should soak the basket, especially the top where all the spokes are sticking out. You will be bending the spokes sharply and they will crack if they are too dry. Remember to start your finish at the beginning of a row. One simple finish is made by folding each spoke over and down next to the following spoke, and twining around both. The end of the spokes are left pointing down on the inside of the basket (fig. 15).
A more complicated finish, one which also reinforces the rim somewhat, involves twining with the spokes. It is a little more intricate than the previous finish, but don’t give up too easily!
Instead of twining around Spoke B, fold it over so that it pairs with Twiner 1 and bring both of them around the back of Spoke C and forward (fig. 16).
Now fold Spoke A over so that it pairs with Twiner 2. Bring the pair A-2 in front of the following two upright spokes and then back between Spokes D and E (fig. 17).
Now drop Twiner 2, holding it flat against the inside of the basket, and replace it with Spoke D, which pairs with A. This should pinch Twiner 2 in place. Bring the new pair D-A forward between Spokes E and F (fig. 18).
Next bring pair 1-B back behind and to the right of Spoke F, drop them to the back and replace them with Spoke F. Fold Spoke C over so that it comes across the front and pairs with Spoke F. Continue around the back of Spoke G and forward with the new pair F-C (fig. 19). Keep going the same way. Each left-hand pair of twiners passes in front of two upright spokes and then back. They are dropped to the inside of the basket and replaced by the spoke to the left which folds over to pinch them in place. The far left upright spoke then folds over to pair with this spoke/twiner and the two continue around the next spoke.
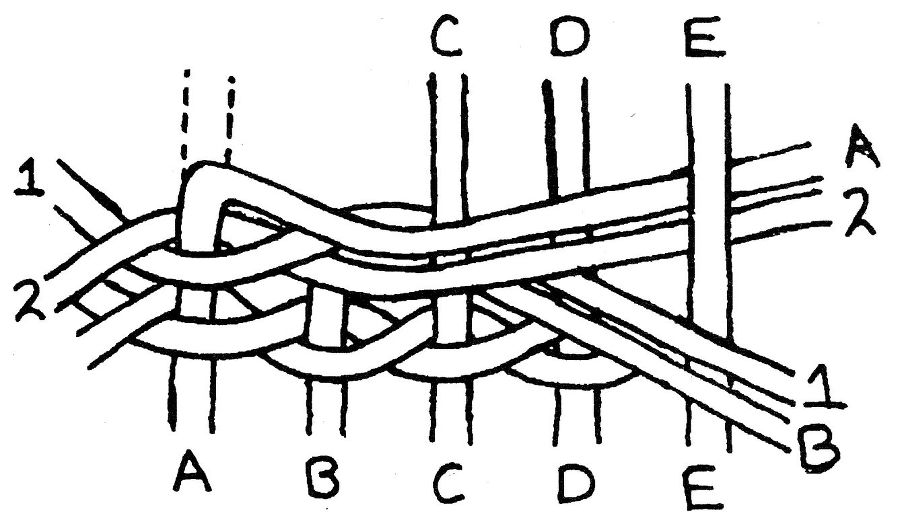
Figure 17
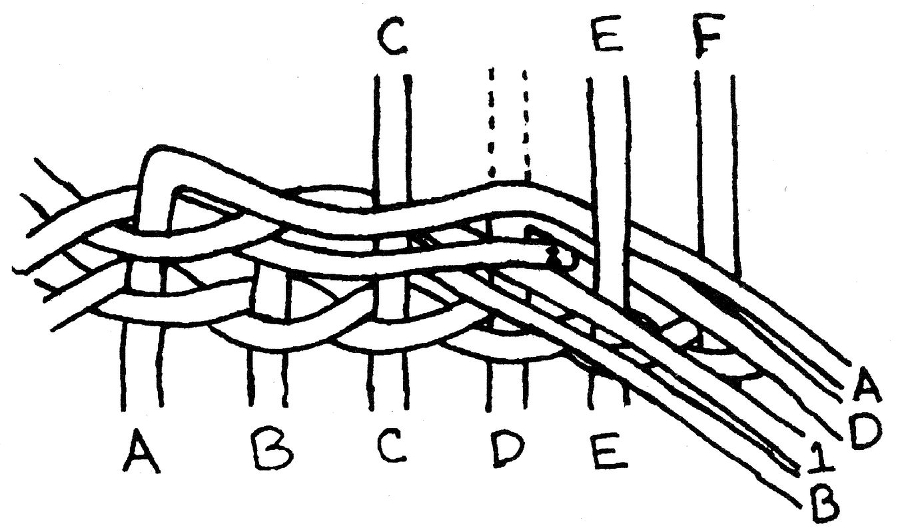
Figure 18
Final Touches
At the end of a finish, work the last twiners into the weaving so that they are held in place. You can either cut off all of the ends that you dropped down, or you can work them into the weave for a more finished look. If you cut them off, leave at least a half inch length until the basket dries.
Before the basket dries, you may want to add hoops or sticks to shape and strengthen it. This is especially important for larger baskets. Weights, props, another basket or whatever you invent can be used to hold your basket in a desired shape until it dries.
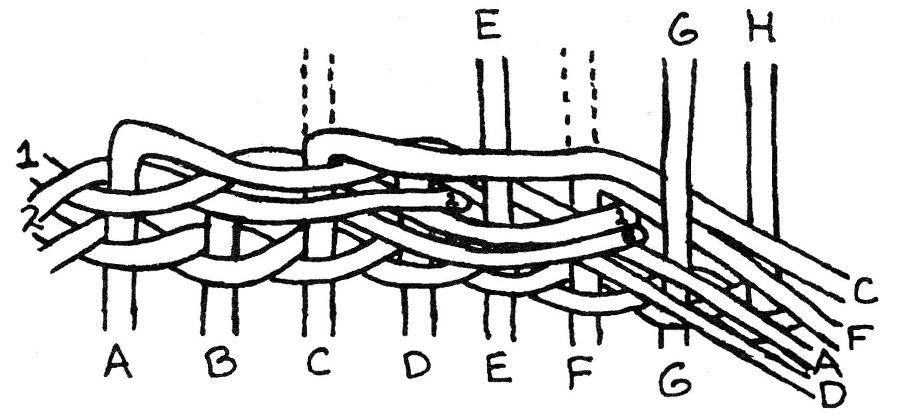
Figure 19
Once the basket is completely dry, go back and trim the splice and finished ends closer on the inside of the basket.
You now have a completed basket. Congratulations. Now go use it!
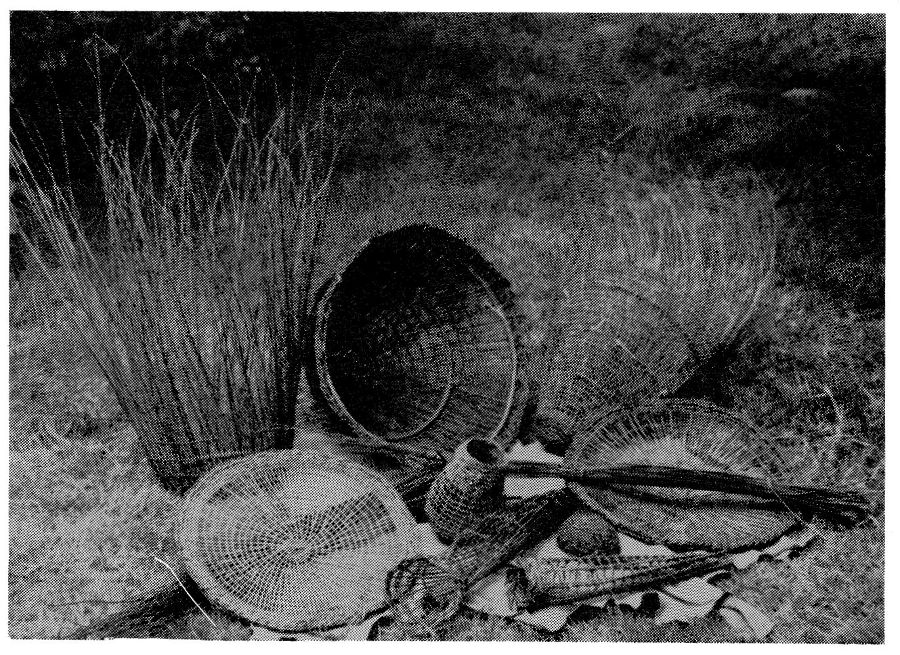
Whole shoot willow baskets of various sizes and shapes serve many useful purposes and with practice are simple to construct. (Photo by Tamara Wilder)

Tamara uses a tump line for comfort and ease in carrying a conical burden basket, a common use among traditional peoples worldwide. (Photo: Steven Edholm)