To dry the willows, simply bundle them and put them in a dry place. To reconstitute them, completely submerge them in water for about forty-eight hours. Larger diameter sticks take more time. Don’t soak them too long, though, or they will start to rot and the fibers will weaken.
To keep fresh shoots fresh, put them in a shady place sealed in a plastic bag or put the butt-ends in water. If these are left too long, they will begin to grow roots and then leaves. This can be used to advantage by planting them in a moist spot, thus starting your own willow patch.
Willow roots so easily that freshly cut, and even not-so-freshly cut, posts will often continue to grow. This is due to gibberellin, a substance in the willow, which in the form of willow tea or willow compost, can be used to help cuttings of other plants take root as well. In concentrated form, gibberellin is a potent herbicide. Willows also contain salicin (which is essentially aspirin), so if you get a headache trying to follow our directions, just chew a “willer” twig.
Hand Positions In Weaving
The fingers of the left hand reach through the spokes and pull them to the left so that the twiners may be laid snugly in place. The thumb remains free to hold down the twiners as they are brought to the front, and to assist in keeping things from unraveling.
The function of the right hand is to maneuver the twiners, pulling them tightly into place. Each twiner is pulled firmly down behind the spokes, around the back and then firmly down in the front.
Tools
The tools that you need are simple: a small, sharp knife and an awl. You can purchase a metal awl, or make your own out of bone or a modified nail. The awl need not be very sharp since it is for opening up spaces in the weaving and not for poking holes in the material. However, it must have a smooth, tapered tip.
Some Things to Remember
Keep everything pulled tight.
Make sure that everything stays moist. If anything dries out at all, soak it a little in plain water. It’s a good idea to dip your whole basket periodically as well. You can also stop and let your basket dry out at anytime. Then when you’re ready to work on it again, re-soak the whole thing.
Most baskets are constructed of many small pieces. For this reason, weaving (twining) is something you do between adding and splicing. Accepting this can save you a lot of frustration when your twining is constantly interrupted by the need to add new materials. However, once all of the movements become more natural, these interruptions will have a minimum impact on the weaving continuum.
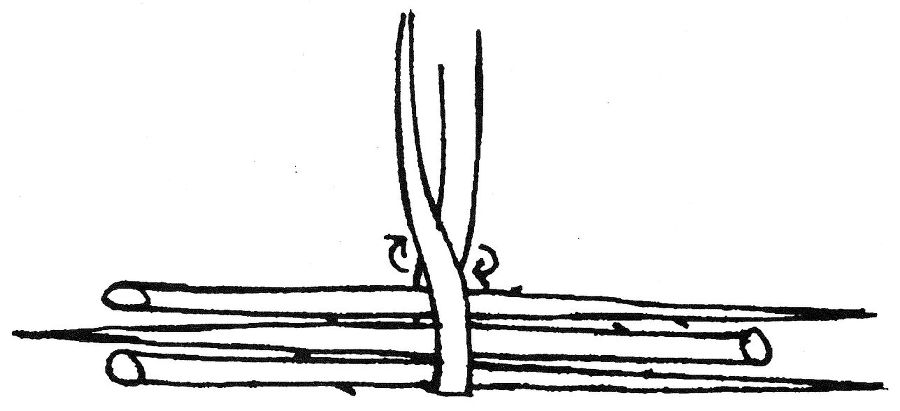
Figure 3
The Start
Select six spokes of similar length and thickness.
Choose a long twiner and fold it slightly off center, at a point a third of the length from the butt end. The butt and tip ends should alternate.
Insert three spokes into the fold, holding this together and flat with the left hand, grasp both twiner ends with the right hand, pull them hard and twist them a half twist away from you. This twist should pinch the spokes very tightly in place, but the spokes should lie side by side and not be allowed to bunch up (fig. 3). (Note: the length of the spokes and twiners in the diagrams have been greatly shortened in order to show tip and butt ends.)
Holding everything together tightly with the left hand, insert the other three spokes into the twist. Hold all of this tight and flat with the left hand, and repeat the a half twist away from you as before (fig. 4).
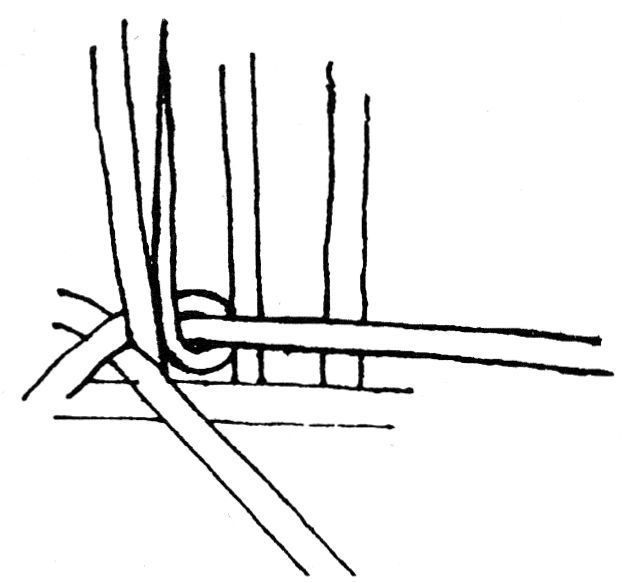
Rotate the second set of three spokes clockwise a quarter turn to form a criss-cross in front of the first set of three spokes (fig. 5).
Twine around the next two sets of three spokes. Bring Twiner 1, which is behind the spokes, forward and lay it in front of the last set of three spokes, now pull Twiner 2 around behind the last set of three spokes and then once again in front at point X where you started (fig.6).
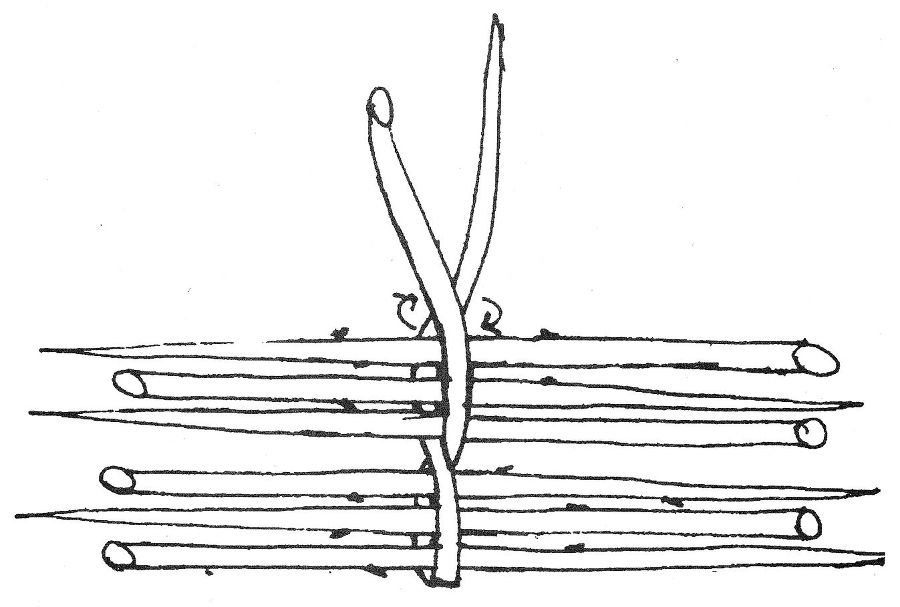
Figure 4
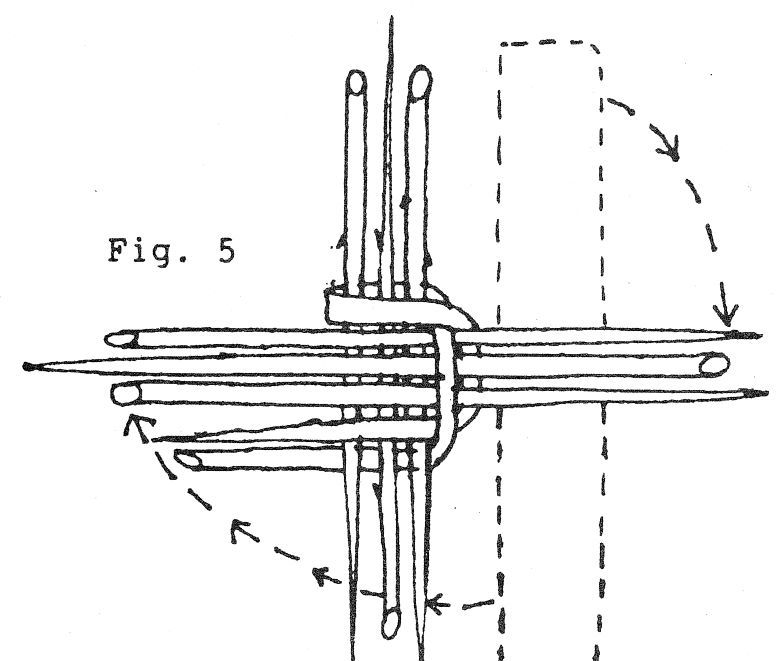
Figure 5
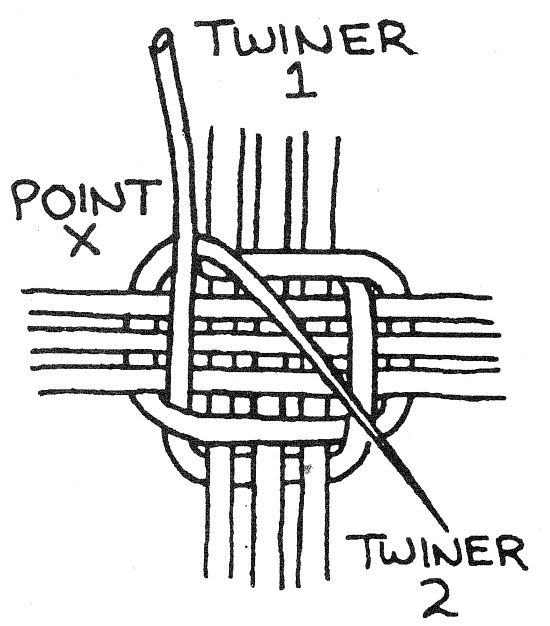
Figure 6
Whether your start seems to have turned out well or not, we strongly suggest that you dismantle it and redo it a couple of times for three reasons: First, you will probably get everything a little tighter after several tries, secondly, you will be more likely to remember the start next time, and lastly, you may have done something backwards.
Twining
Having completed your start, you will now begin from point X twining around individual spokes instead of groups of three. Grasping the start with your left hand, hold Twiner 2 in place against the start with your left thumb. With your right hand, bring Twiner 1 back behind at Point X and then forward again between Spokes A and B (fig 7).
Pull it firmly into place and lay it flat against the front of the start. Transfer your left thumb to it, letting go of Twiner 2 which should now be pinched securely in place. With the right hand, bring Twiner 2 back between Spokes A and B, pull it back firmly and then forward between Spokes B and C. Pull it down to lay against the start. Releasing Twiner 1, hold it in place with your left thumb (fig.8). This is twining. Alternately each twiner passes in front of the following spoke, behind the next, and then forward again.
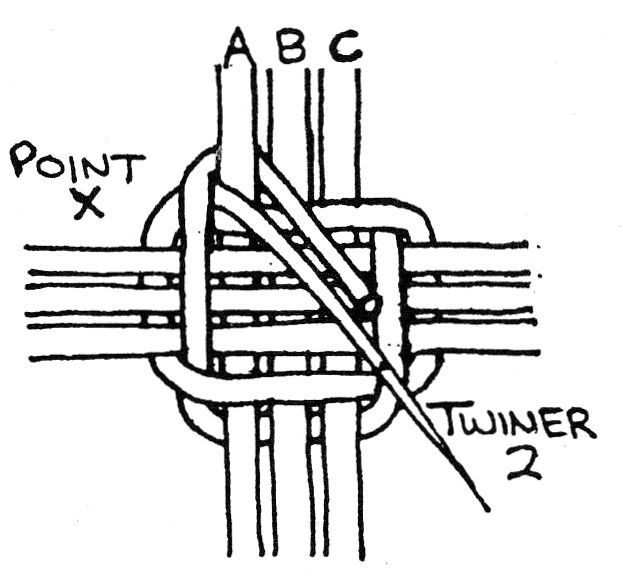
Figure 7
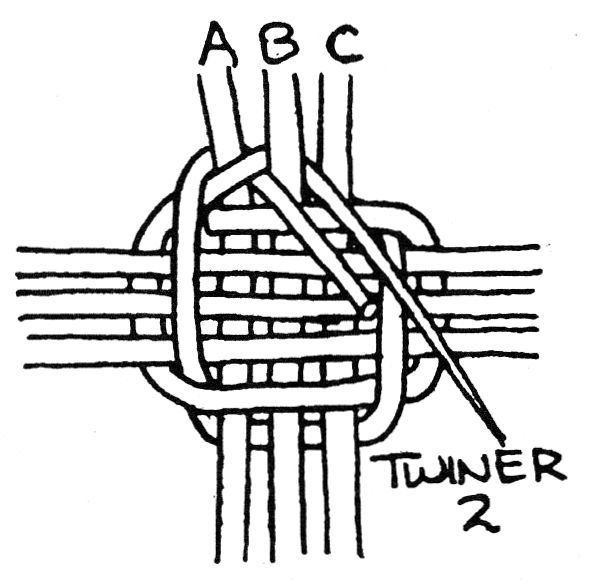
Figure 8
Splicing
All too soon you will notice that one of your twiners is getting short. Your first splice should be onto the butt-end of the first twiner (which was folded over). After this, you will be splicing onto the tip ends as they become thin. Always splice to the forward twiner, that is the one that you have just brought forward. Leave at least an inch of length on the old twiner to splice onto. Select a new twiner and insert it, butt end first, between the spokes and under the twiner being replaced (fig.9). The new twiner should stick out through the back of the start a half inch or so. Hold it there with the fingers of your left hand.
With your right hand, bring the end of the old twiner down to the left, under the new twiner, and up to lie parallel with the left spoke. Hold it in place with your left thumb. Again with the right hand, grasp the twiner that was not replaced and continue to weave with it, passing over the splice, behind the next spoke, and forward again (fig 10).
If everything was done properly and tightly, the splice should be pinched in place so that it cannot unravel (fig. 11). If not, unwrap and try it again. Continue twining until you reach Point X, splicing onto the other twiner each time it becomes too thin.
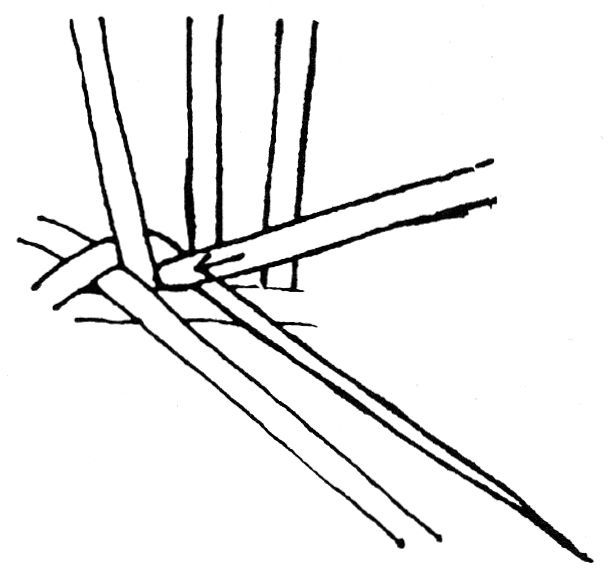
Figure 9