Roots
Roots provide some of the best material for basketry, but they tend to be overlooked by beginners because it seems like so much work to get them out of the ground. Don’t be discouraged. Just don’t bother digging in rocky or clay soils or in the dry time of the year. You usually don’t even need to dig straight down anywhere if you look for the best places.
Look for roots growing along the sides of creeks, especially after the water has subsided from a heavy rainstorm. You can usually wade along and gather up the roots that have washed out of the bank. This is good for willow, cottonwood, alder and other river roots. Many plants, especially conifers such as cedar, like to grow in the looser soil and punky wood associated with stumps and fallen logs. These are called nurse logs in the Northwest, and are often full of long roots running along their length. You need only pull them apart and take what you want. All root gathering requires that you replace the soil and cover any roots you may have left. Don’t leave a strip mine behind you, please!
Try the following roots: conifer including spruce (Picea sp.), pine, redwood (Sequoia sp.), cedar, juniper (Juniperus sp.); river roots including willow, cottonwood (Populus sp.) and alder (Alnus sp.); sedge (Carex sp.); maple (Acer sp.), oak (Quercus sp.); bracken fern (Pteris aquilinum); horse tail (Equisetum sp.); tule and bulrush (Scirpus sp.); briar root (Smilax californica); and yucca (Yucca sp.).
Small roots usually work just as they are, and modern weavers often like the fantastic twists and turns that a traditional weaver would shun. Roots peel in spring just like shoots do. For finer weavers, and those used to produce the watertight basketry of the western states, larger roots need to be split down into weavers with no outer surfaces. The split surfaces absorb water when the basket is in use and swell up to effectively seal the basket. Conifer roots are used most often in this way.
In traditional basketry, conifer roots are usually cooked. This softens the root slightly and allows the bark to slip easily at any time of the year. For split-root weavers, you may gather roots up to wrist-size and any length. But it is best to get roots that will fit easily curled in a canning kettle for cooking. I prefer finger-sized roots.
Very large roots were steam-baked in a sandy river bar in the old days. This is done by digging a long trench in damp sand. Next, build a fire in it for an hour or so, scrape out the fire, set the roots in and cover them with damp sand about a foot thick. Then build another fire on top and let it die down overnight. Uncover and split the roots in the morning.
Smaller roots can be boiled from ten minutes to an hour, but do not overcook them; this actually hardens the roots, especially if they are left standing in the water as it cools. Cook only as many as you can split while the water is still warm. In the northwest, traditional weavers roast cedar roots over a coal fire until they crackle and the bark slips easily. Some California weavers use ovens and even microwaves. Be forewarned: If you use your oven, you may not want to cook food in it ever again. The sap gets into everything (experience of a Yurok weaver).
Split the roots in the same way you did the shoots, in half, and in half again, flatwise as many times as it takes to thin the ribbons down to about one-eighth of an inch in thickness. The width will be as wide as the root. These strips are then stored away and seasoned, as are shoots.
When you are ready to weave, soak them in warm water for one-half hour and then soften the root by working the ribbon over a blunt edge such as a mussel shell or butter knife. Rub the root over and over from the middle out to each edge and on both sides as if you were trying to scrape something off the surface. I like to pinch the root between my thumb and the tool in the same hand and pull the root away at about a ninety-degree angle. After about ten minutes the root will be fully softened and rubbery. It can be used as a flat ribbon or stripped into narrower weavers along the growth rings. Try not to trim roots with a knife as they will fray at the cut.
The other roots listed may be used whole or peeled and do not need to be either cooked or softened. Sedge roots, used in Pomo and other central California traditional weaving, are dug, split once, peeled and trimmed to size. They are light tan in color. Horsetail roots are pure black. Bracken fern roots have two flat, structural filaments inside the root that are encased in a white sticky matrix. These are cleaned off and soaked in a black dye to enhance their natural dark-brown color. Tule roots and briar roots are also a natural dark red-brown. Yucca roots have a beautiful magenta to dark-brown core. Gently crack off the outer root bark to expose this. The bark can also be used as a red dye.
Barks
Bark fibers may be divided into two categories: wet, or inner barks gathered from live trees, and dry, or exfoliating outer bark. I will deal with wet inner barks first, as these are the strongest and most commonly used. The best live bark includes the growing cambium layer directly in contact with the wood. This means if you strip all the bark off of the tree it will die. Which is alright if you cut the tree and intend to use the whole thing for firewood or building. If not, take only a small strip of bark running up the tree rather than around it. In the Northwest, you can still see ancient cedar trees showing long scars where people gathered bark for generations without killing the tree.
Try the following inner barks: cedar, birch, maple, willow, juniper, cottonwood, cherry (Prunus spp.), basswood (Tilia sp.) including tulip poplar, and hickory (Carya sp.).
Gather live bark in spring and summer when the sap is flowing. To gather a strip of bark from a standing tree, cut a slit horizontally no more than one-eighth of the width around the tree. The best bark is from small to medium-sized trees so that the thick outer bark is not so cumbersome and hard to cut through. Gently loosen the bottom of the strip and pull backward, stripping up. The strip will gradually feather out and pull free. For a slab of bark, cut a score on the tree the size you want and gently pry it off. If you cut the tree down, you can get an entire bark round, or you can score the bark with a knife and peel off exact-sized strips. These are especially suited for plaited basketry. In all these cases, try not to pull the bark off at an angle greater than about 45° or the bark will crack and bits may stick to the wood and feather off more quickly.
Bark strips may be split down flatwise into thinner pieces using the same splitting technique described earlier. It is easier to split bark because it naturally tends to separate into papery layers. Sizing the bark for width first makes it easier to split as well.
In the Northwest, weavers use a cedar bark sizing tool similar to those used to make rawhide thongs to measure width. You can make a primitive one by setting an obsidian blade into a notch in a flat piece of wood. The cutting edge should be perpendicular to both the notch and the flat plane of the wood. Slide the tool down the edge of your bark. The sized strip will come through the notch.
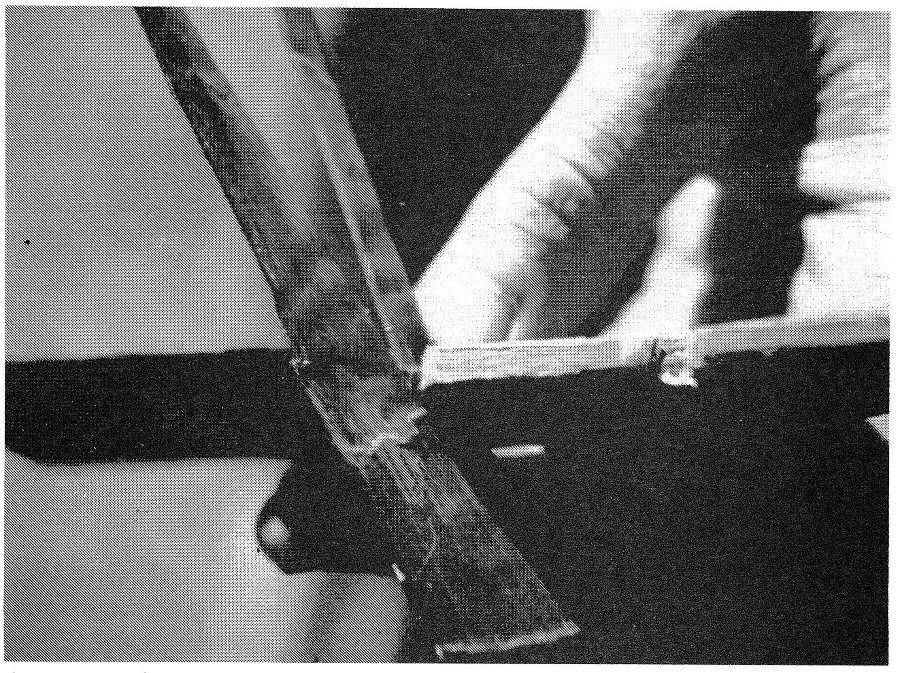
A sizing tool can be made by setting an obsidian blade into a notch in a flat piece of wood. The tool the slides down the bark, cutting uniform strips.
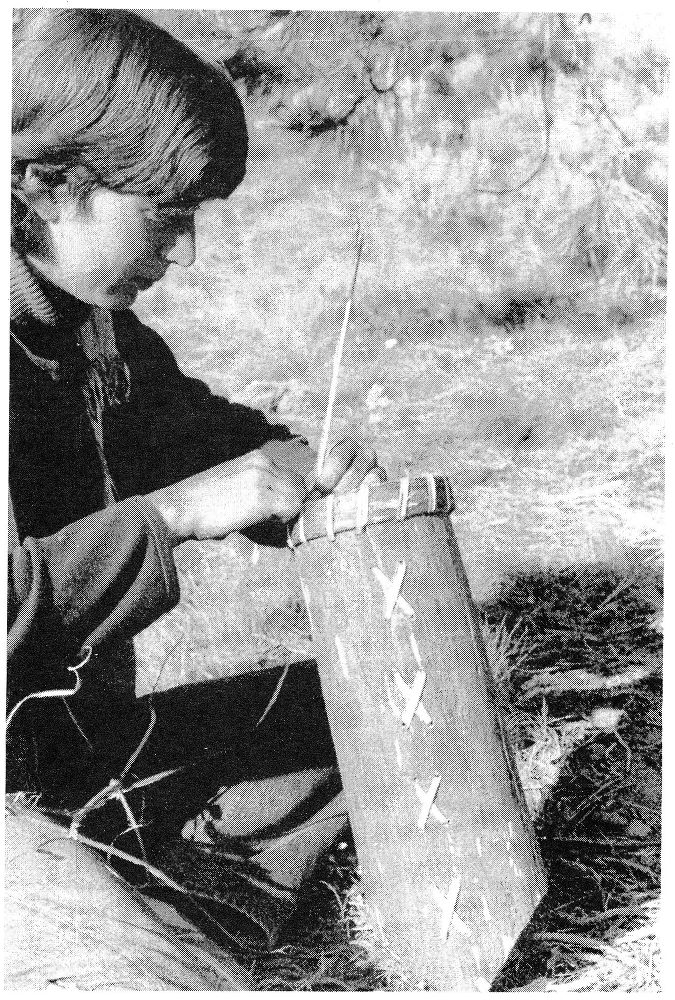
The author uses a length of stripped willow bark to lace an external rim reinforcement strip of juniper bark to her bark basket. (Photo: Jim Riggs)