BUDDY BURNER
This project results in a handy little cooking implement that is great for when the power goes out and the weather prohibits using the patio grill or even a campfire. Plus, this is a fun project for the kids in the family.
MATERIALS
Corrugated cardboard
Knife or scissors
Empty tuna can
Old candles or crayons
Matches
Bricks or small rocks
Small pot lid or aluminum foil
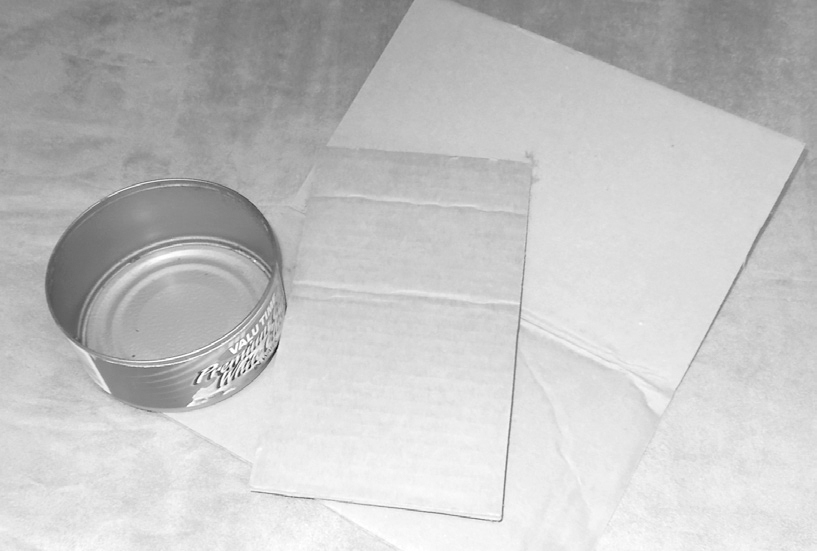
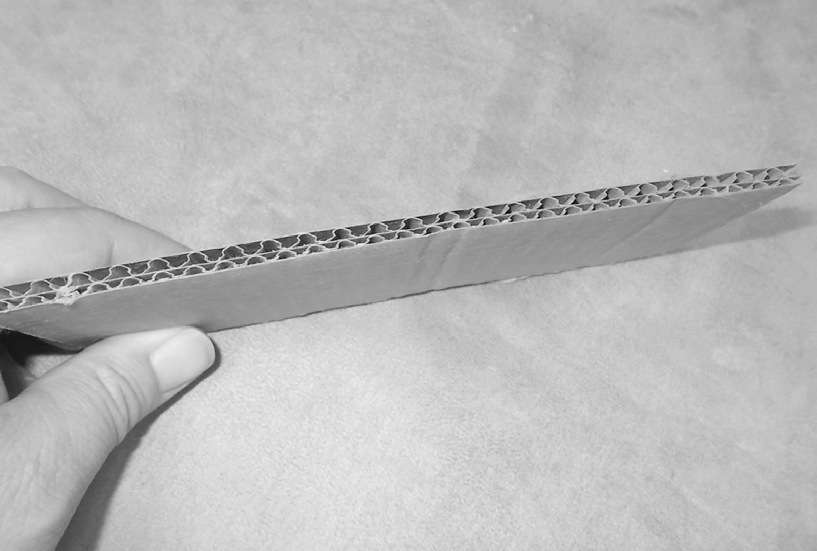
#1Start by cutting the corrugated cardboard into strips. The width of each strip should be about the same size as the depth of the inside of the tuna can. Corrugated cardboard is the type that consists of two thin sheets with what looks like ripples between them. When you cut the strips, you want to have those ripples visible along the long edges of the strips. In other words, when you look down along the long edge of the strip, you should see what looks like little holes all along the edge.
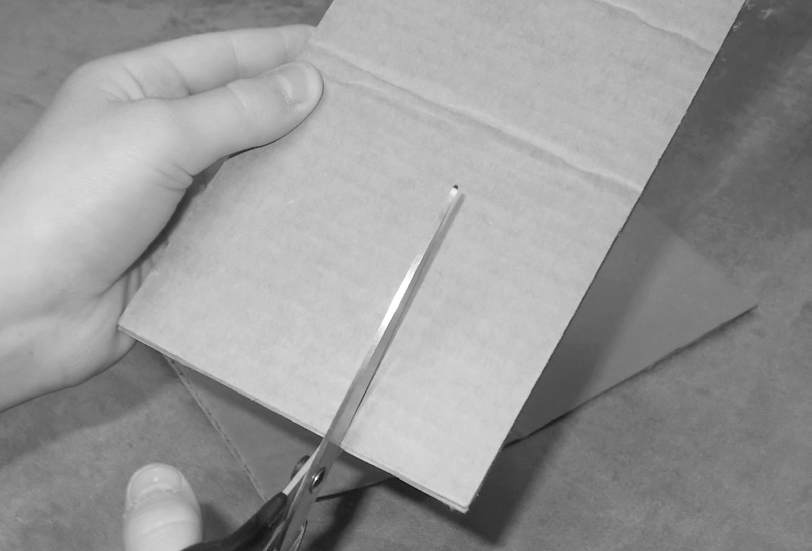
#2As you’re working on that, start melting your candles or crayons (see page 70).
#3While the wax is melting, begin placing the cardboard strips into the tuna can. Start at the inside edge of the can and work your way toward the middle, wrapping the strips around and around. You want to end up with the entire interior of the can filled with cardboard.
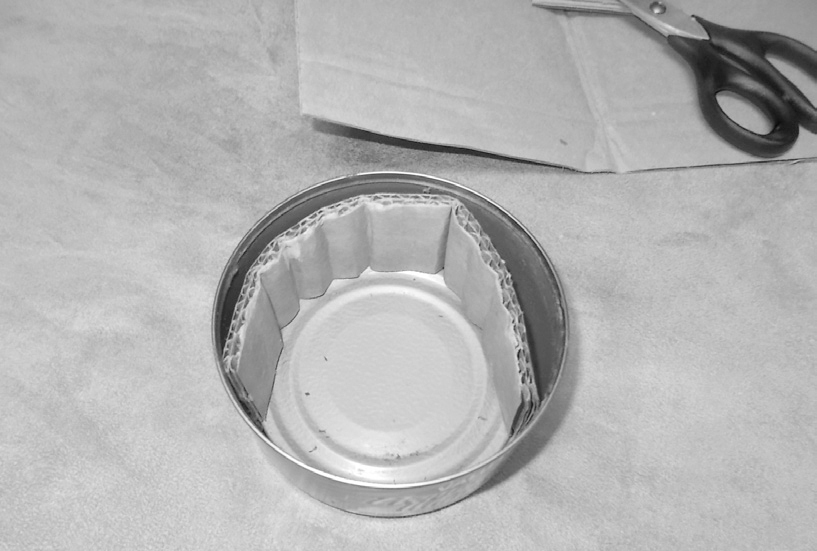
#4Once the wax is completely melted, carefully pour it over the cardboard, filling each of those little holes. Then let the wax cool and harden.
#5When it comes time to use the Buddy Burner, strike a match and hold it just above the wax, until you see the wax begin to melt a bit. Then, just lay the lit match in that spot and the wax will begin to burn. It might take a minute or two but soon you’ll have a fairly substantial flame.
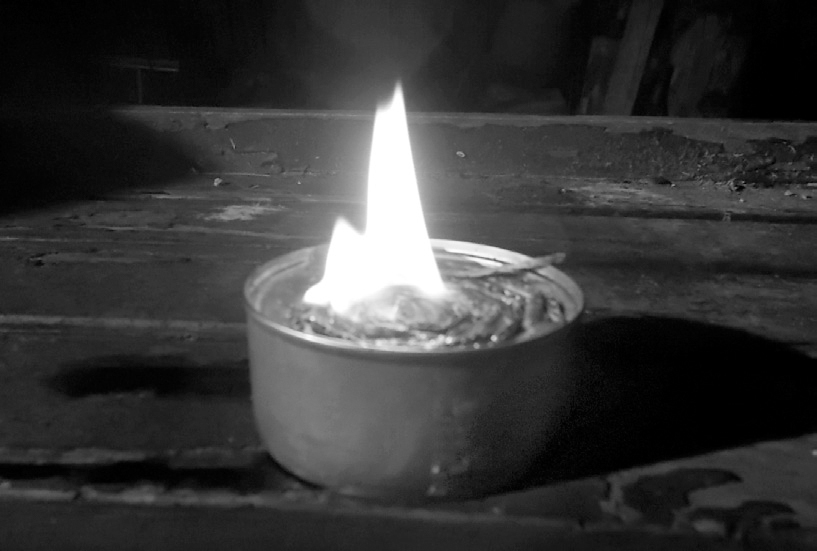
#6You don’t want to put your cooking pot directly onto the Buddy Burner, as you’ll smother the flame. Instead, use a couple of bricks or small rocks stacked on either side of the can to support the pot above the burner.
#7The Buddy Burner is safe to use indoors, as all it amounts to is a giant candle. Of course, the normal warnings apply as to any sort of open flame indoors. Don’t use this near curtains or other flammable objects.
#8To extinguish the flame, simply cover it with a pot lid or even a piece of foil to smother the flame. The Buddy Burner will last quite a while without the need to refill it with more wax.
BRICK ROCKET STOVE
The next time you visit a garden center, pick up a small load of patio paver bricks. You’ll need 20 of them for this project, which should run you all of about $10 or so. Color of the bricks doesn’t matter, just get whatever appeals to you. You can keep them stacked in the corner of your garage until you need to assemble this quick-and-dirty rocket stove.
Rocket stoves come in many different shapes and sizes. At the core, though, they all share the same basic design. At the bottom, you’ll have the burn chamber, into which fuel and air are fed. Rising up from the burn chamber is a chimney, which draw the heat from the flame upward, concentrating it on your cooking pot, which rests at the top of the chimney. A rocket stove is a very efficient tool for cooking off-grid, using a minimal amount of fuel for maximum results.
MATERIALS
20 brick patio pavers
Wide masonry chisel
Hammer
Eye protection
Work gloves
Small sticks and twigs
Cotton balls or newspaper
Matches
#1The first step in this project is also the most difficult—cutting one brick paver in half. When you buy the bricks, you could certainly ask if they could cut one for you. Some places might have such a service. But this fairly straightforward process takes just a minute or two to do at home. You will absolutely want to wear eye protection and work gloves when you break the brick. Small pieces of it will go flying.
#2Start by measuring the halfway point on the brick, either by using a ruler or just eyeballing it, and drawing a cutting line using a piece of chalk or just scratching it out with a rock. This isn’t open-heart surgery; don’t worry about making things absolutely perfect. Using the chisel, score this line a few times. All that means is to use the chisel to make a groove along that cutting line. Hold the chisel in place along the line and lightly tap it several times with the hammer. It should begin to cut into the brick a bit after several taps. Some folks advocate doing the same thing on the opposite side of the brick, or even all four sides. Personally, I’ve not had a problem with just scoring one side and moving on from there.
#3Once you have the cutting line scored to your satisfaction, line up the edge of your chisel in the groove. Making sure the chisel is as perpendicular to the brick as possible, give it one solid whack with the hammer. If all goes as planned, the brick will break into two pieces, right along the scored line. It won’t be perfect, but that’s okay, it doesn’t need to be.
#4Find a reasonably level spot for the rocket stove. It can be built right on the ground, but I advise you not to place it on grass or other flammable material. While the flame will be fully contained within the stove, small burning sticks may occasionally fall out and end up on the ground.
#5This rocket stove is built in layers. All you’re doing is dry stacking the bricks in a certain pattern for each layer. The first layer is the base, of course, and looks like this.
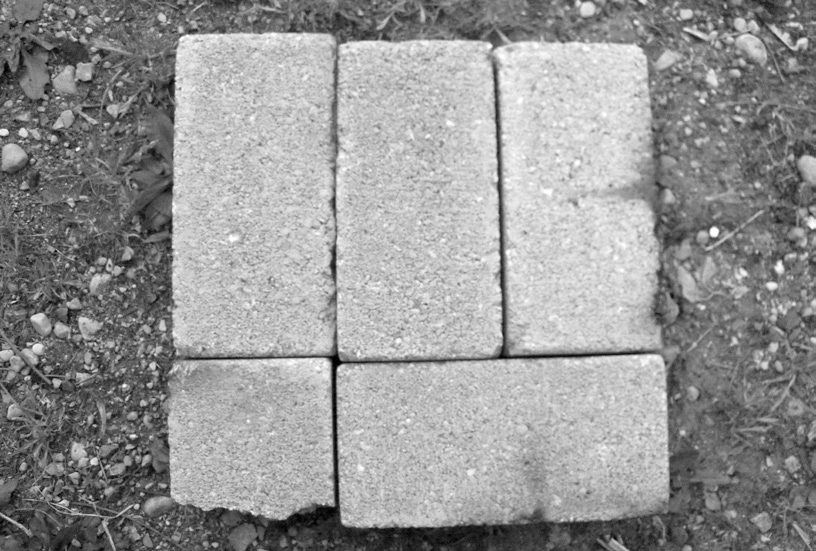
#6Notice that you’re using one of the half-bricks in the bottom layer. It really doesn’t matter if the cut edge faces in or out.
#7The next layer uses the other half-brick, like so.
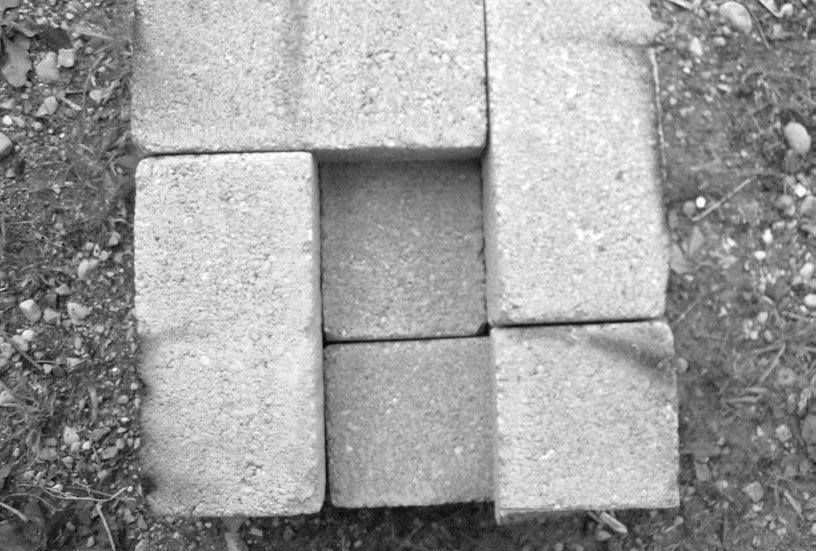
#8Then, the next two layers.
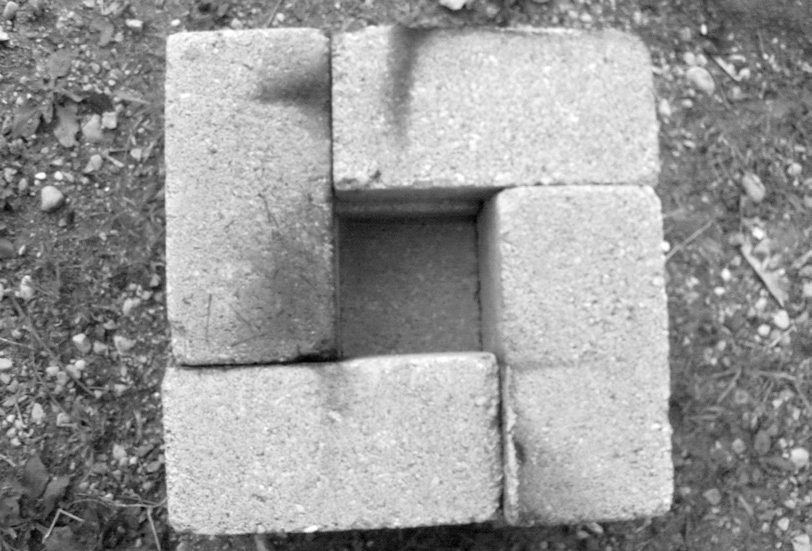
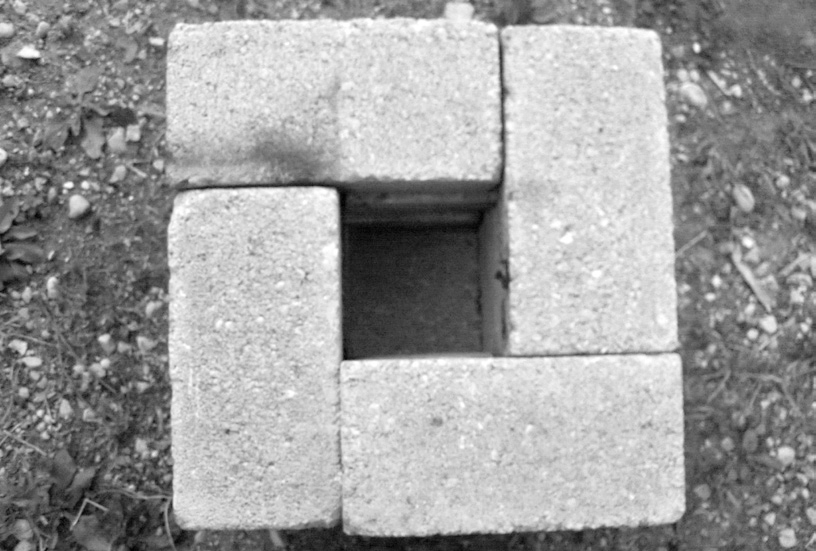
#9Then, place two bricks on each side of the chimney opening at the top. This is where you’ll place your cooking pot.
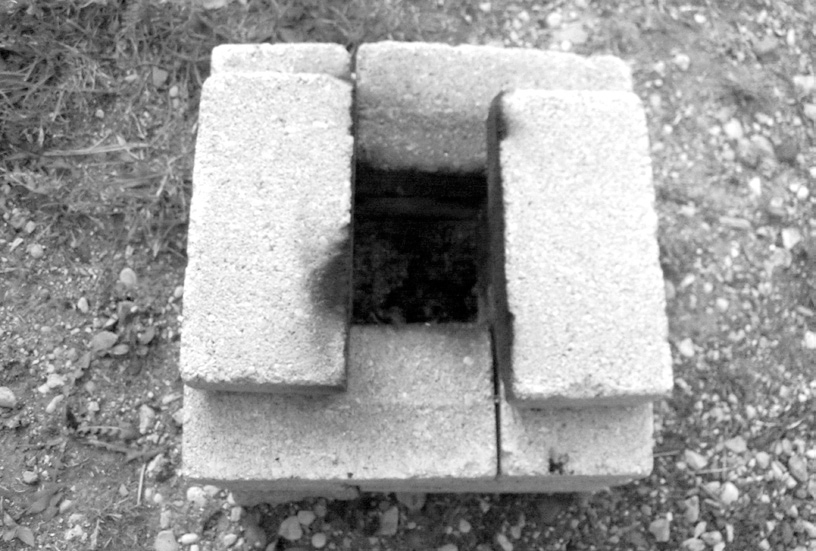
#10Place one more brick at the bottom, in front of the fuel chamber opening. This gives you a shelf where you can position fuel.
#11Your rocket stove is going to use small sticks and twigs for fuel. I like to use cotton balls or newspaper to help get the fire started. Toss some of that into the fuel chamber, then feed in a few thin sticks. Drop a lit match onto the cotton or newspaper to light the fire. As the fire burns, gradually add more sticks until the fire is hot and burning well.
#12Place your cooking pot on top and away you go. Feed fuel into the chamber as needed. You’ll want to pay close attention to that, in order to ensure a steady cooking fire. You can add a little more fuel or taper it down a bit as needed.
#13You won’t be able to cook several meals with this stove without cleaning it out from time to time. As you’ll notice, the burn chamber isn’t all that large and it will fill up with ash and charred fuel after a while. A true rocket stove is well-insulated and, as a result, there is usually very little ash and such left over. Our makeshift one here isn’t quite that efficient. But it also costs just a few dollars and takes 5 minutes to assemble.