CELERY
This one is almost identical to growing romaine lettuce. Cut the celery so as to leave a stump 2 inches to 3 inches high. Place this in a shallow dish with the cut side facing up. Fill the dish with water about halfway up the stalk. Celery grows fairly quick in the beginning. Leave the dish in a sunny spot and you’ll notice new growth from the center of the stalk within a couple of days. Once the new growth is about an inch high or so, transfer the stump to soil. Water it regularly and you’ll have harvestable celery within a few months.
POTATOES
Most of us already know this, but you can grow a mess of taters from just one, if you know what you’re doing. Simply cut up the potato into chunks, with at least one eye per chunk. Let these sit out for a few days to dry out, then plant in soil with the eyes facing up. Potatoes are slow growers, so be patient.
GARLIC
When you buy garlic, you will get several cloves. Take one of them and plant it in soil with the roots (the flat part of the clove) facing down and the pointy end facing up. Cover with about an inch of soil. Keep the container of soil in an area with direct sunlight and water it regularly. You’ll soon see green growth coming up. Clip this growth when it gets to about 3 inches high, leaving about an inch to regrow. Eventually, this will stop growing and dry up. That’s when you’ll know the cloves are ready to be harvested. Each clove you plant will result in an entire bulb (several cloves) of garlic.
ONIONS
Slice off the root end of the onion, leaving about ½ inch or so of onion attached to it. Plant this in soil with the roots facing down. It shouldn’t be planted very deep, just an inch or so beneath the surface. It will take about three months to grow and mature into a new onion. When the aboveground growth turns yellow, that’s when you’ll know it is time to harvest.
GREEN ONIONS
After you’ve chopped off the green part of the onion, put the remaining white bulb in water with the root end facing down. A narrow drinking glass works great for this. Find one at a thrift store if you don’t have one at home. Keep the glass in a sunny spot and change the water every couple of days. Soon, you’ll see roots forming at the base and green growth starting at the top.
GINGER
This one is about a simple as it gets. Few people use an entire ginger root before it begins to go bad. Just cut off what you need, then plant the remaining root in soil with the buds facing up. Unless you live in a very warm, humid environment, this will be an indoor plant for you. As it grows, the roots will spread out. It will take about four months of growth before you’ll be harvesting new ginger. When that time comes, just cut off what you need and cover the rest with soil again.
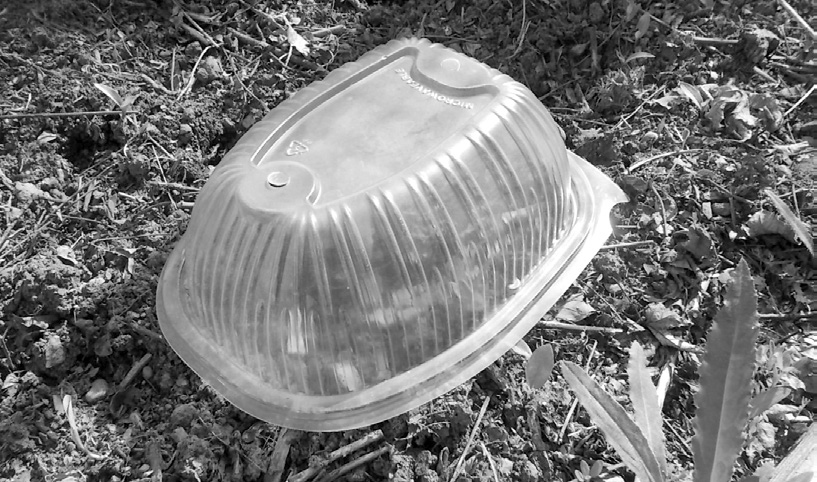
TAKE-OUT CONTAINER GREENHOUSE
Many of us purchase take-out food at least once or twice a month, perhaps even weekly. Often, these plastic containers are just about perfect for making little greenhouses for seed starting or growing herbs. Repurposing the containers in this way helps to reduce what ends up in landfills, too.
Without getting into the science at work, suffice it to say that greenhouses work by turning the sun’s energy into heat and trapping it, warming the soil and plants inside the structure. The take-out container you use for this project must have a transparent lid so as to allow the sun’s rays through. In fact, depending upon your situation, you might only need to use the lid.
MATERIALS
Take-out container
Seeds
Soil
#1Wash the container and lid thoroughly to remove any and all food residue. I like to use newspaper pots (see sidebar) for seed starting. If the container is deep enough with the lid on, you can simply place your newspaper pot in the container and cover it with the lid. Remove the lid as needed for watering. You should also allow for adequate airflow by either propping up one end of the lid or poking a few holes.
#2Another option is to simply fill the container with soil and plant your seeds. Put the container on a windowsill where it will get sunshine daily and you’re all set. Obviously, make sure to keep the container covered to warm the soil and plants. Don’t forget to water the seeds, either.
#3You can also use these outside in the garden. We’ve placed them over seedlings we transplanted, as the lids will keep the plant warmer during the cold evenings in early spring.
NEWSPAPER POTS
Newspaper can be recycled and made into small pots that are perfect for seed starting. The easiest method involves using The Pot Maker, which is a handy little device you can find almost anywhere garden tools are sold, including online. Simply use Google to find one near you. The way it works is rather simple. A strip of newspaper is wrapped around a wide dowel, with the bottom edge of the strip overhanging about two inches on the bottom of the dowel. The overhanging paper is then folded over and crimped, making a flat bottom. The newspaper pot is slid from the dowel and placed into a container, then filled with soil and a seed.
Once the seedling is sufficiently mature to be transferred outside, the whole newspaper pot is placed into the ground. It will decompose as the plant grows.
COOKING
One of the first things to go in the aftermath of most disasters is ready access to things like electricity. With the power gone, your microwave oven, toaster oven, and even perhaps your stovetop are all useless. If you have a charcoal or gas grill, you’re still in business. Grills can be used to cook more than just steaks and ribs—you do know that, right?
In addition to grills, so many people have patio fire pits you’d think it was mandated by law. These work great as portable campfires. With the right gear, you can cook darn near anything on them.
But what if the grill and the patio fire pit were both buried under 2 feet of snow? What if the temperatures outside were south of zero and still falling? Or it had been raining for so long you expected animals to start filing, two by two, into the neighborhood?
The projects in this section might not allow you to put together a five-course meal on the fly, but they’ll all boil water and heat a pot of soup. A couple of them, such as the Buddy Burner and the Altoids Tin Alcohol Stove, can be used indoors, provided you’re in an average-size room with good ventilation. Others, like the Brick Rocket Stove and the Hobo Stove, need to be used outdoors due to the large flames and high heat generated.
Remember, though, that any time you’re dealing with an open flame, due caution is advised. It’s not the best time to engage in a round of tackle football with your kids, for example.
Also worth noting is the fact that most of your standard cookware isn’t made for long-term use on an open flame. It might warp a bit and it will almost surely become soot-covered on the bottom. You can help with the latter by rubbing a bar of soap on the bottom of the pan prior to use. If you were cooking over an actual campfire or even your patio fire pit, the goal would be to cook over hot coals rather than flames. With these projects, though, you don’t really have that option. You’ll be using fire, not coals, to heat your pan and your food.
If you have the opportunity to purchase one or two pieces of cast-iron cookware, I highly encourage you to do so. First, they are very well-suited for cooking over an open flame. Second, everything just tastes better cooked in cast iron. Try it and I’m sure you’ll agree.