From there, the dwellings became more and more sophisticated and entire communities were built in large stone conclaves, like the famous dwellings in Mesa Verde, Colorado.
By studying these and other early dwellings, we can learn basic, time-proven principles that can be applied to any shelter construction today. Early people combined their human needs and ingenuity with the natural resources around them to develop shelter most suited to their lifestyles, within their natural environment. Many natural shelters can be found that can be as comfortable and weatherproof as a man-made construction.
For instance, the natural sheltering abilities of hollow-based trees, upturned roots, large logs or boulders will protect against the elements in a pinch. And a huge sage or juniper with it’s umbrella-like branches can provide a dry shelter.
Dirt banks, rock shelters and caves can be improved with the addition of a few poles and some bark or other material piled against it, to keep out wind and rain.
A good campsite provides several things: protection from the wind, storms or flooding; level ground; an abundance of firewood; and food and water sources. Consider the need for mobility or permanence. If you plan to settle into a base camp for several days, it is important to have a good water source nearby for cooking and drinking. I like a flat area near water, but not too close. Everyone likes the relaxing sound of rushing water, but remember that insects are drawn to water and the air is more humid and cooler in the canyon floor and near the stream.
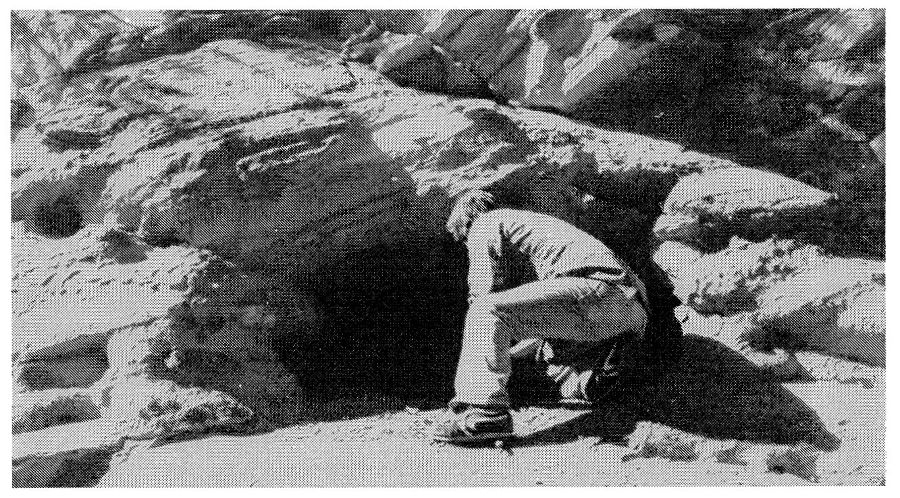
Improvised shelter can be found in rock overhangs or caves and improved with the addition of a few dead limbs or brush (Photo by Linda Jamison).
Next, choose an area where materials are close at hand. Large rocks are handy to bank a fire for warmth at night and to make cooking easy. A good supply of wood that can be broken up for firewood should be nearby as well as plenty of willows and large cottonwood trees to use as building and bedding materials.
The type of shelter I prefer to build in the desert environment is called a “wickiup.” All wickiups seem to have two features in common: a frame or skeleton of poles, and some sort of covering. It is a spontaneous shelter that is time-tested and remains open for improvement by anyone.
Naturally, the size and materials used vary greatly with environment and culture. For instance, Apache wickiups were often thatched with grass, while Ojibwa wickiups were pole domes covered with sheets of birch or other bark. Plains Indians used animal hides to cover their rendition of a mobile home, which was warm, secure and easy to move as they migrated with their game. (For information on wickiup construction see ‘The Wickiup’ by Jim Riggs, The Best of Woodsmoke, Horizon Publishers, 1982. p. 22.)
Regardless of what shape or type of shelter you build, some factors should always be considered. For instance, build shelter that is sturdy enough to withstand the worst weather you plan to encounter and you will never worry about having it collapse in the middle of the night during a storm.
Determine the size of your shelter before you start. A little preplanning can make all the difference in how well your shelter protects you from cold or heat, which is why you are building it in the first place. Especially in cold weather when you need to heat the interior, don’t make it bigger than necessary. But do allow room to stow your gear and some dry firewood inside the shelter in case of rain or snow.
Whenever possible, face the opening of your shelter to the morning sun and keep the prevailing night wind at it’s back. A large doorway left open can capture reflected heat from the night fire, yet provide shade and allow plenty of air to circulate during hot afternoons. If rain threatens, the doorway can be closed by a thatched grid, or a pre-fabricated panel can be used as a moveable closure and windbreak.
A small fire pit can be used inside an enclosed shelter as long as you leave an opening in the top for smoke to escape (like a tepee), burn non-resinous wood and keep the flames low. It’s pretty obvious why you shouldn’t use resinous woods that spark like Juniper or pine in an enclosed shelter. Soft woods like cottonwood or sage are good for a quick start up, then add some hardwoods like oak or maple for long-burning coals.
Spark reflectors are made with a few upright stakes or by piling up a few green pine boughs about six inches high around the fire pit to catch flying sparks and prevent burning up your dry bedding or your entire shelter for that matter. Bedding should be kept at least a foot away from your fire pit or reflector fire.
Shelters are relatively easy to build in a rich forest environment. That’s why building one in the desert where marginal materials are available is a real test of ingenuity. But forested areas provide their own unique challenges. The main concern is moisture from both the ground and from above in the form of rain or snow, so it’s important to insulate well. Moisture also indicates a fire within the shelter for warmth. So, you must build your shelter large enough that a sleeping fire will not set it on fire, yet not so large that you will lose valuable heat.
Among the many types of shelters that are quick and easy to build, the “A” frame takes the least amount of work and materials: Three forked stakes are wedged together or lashed to form a tripod, a long pole is stretched backward and rested on the ground, then logs and snags are leaned against the main pole to enclose the sides. The end can be closed or left open as you like, depending on the weather. Add a layer of insulation to the outside, then dry pine needles for bedding and you are finished. In heavy snow areas the snow will eventually pack to form insulation over the shelter.
A quickie shelter can also be built against a rock for added protection from wind and rain and the rock base holds heat from your reflected fire.
Another common mountain shelter is a lean-to. It is similar to the “A” frame but can be enlarged for more people. I like the lean-to because the design allows me to have a sleeping fire the length of my body. A lean-to is especially vulnerable to wind when one side is left open, but it is easy to enclose quickly in case of a storm. It is also inclined to collect winter snow drifts, so be sure to face your shelter so that the prevailing winds blow crosswise rather than directly into or behind it. If you plan to stay in an area for a week or more, excavate the floor a few inches and use the dirt to pile up around the outside for better insulation.
Obviously, the rule to building an adequate shelter is improvise, improvise, and improvise. Each geographical location will demand different structure and materials, each season of the year will mean more or less insulation.
You can use your own ingenuity to devise various types of shelters suitable for the circumstances at hand, but a good shelter is like a work of art, it should be built with pride in workmanship and an eye to utility.
The majority of my trips take place in the desert, a strange country where you can shiver all night in the cold and swelter in the heat of day, all in the same 24 hour period. And the first night is generally the worst for most students, probably because they don’t know what to expect. Most of them wake up several times during the night. I can almost set my watch by it.
In an open wickiup, the fire is built just outside the opening of the shelter, not inside, and banked with rocks or logs to reflect heat into the shelter. Once you get a good bed of coals going, you can add a log about as long as the shelter doorway. The reflected heat keeps you warm most of the night. And you can keep a few extra pieces of wood within arm’s reach to add in the coldest hours of early morning. A good pit fire surrounded with stones ashes over rather quickly and can remain alive for many hours to provide relatively safe heat.